While Portable Document Format (PDF) files tend to be smaller than that of the original source document, they can still occupy significant space. In order to post them to a web page, attach them to an email or save them to a disk, it might make sense to compress or reduce the file size. Most PDF writing programs, like Adobe Acrobat Pro, have file compression options.
1- Launch your PDF writing program. In this example, Adobe Acrobat Pro is used.
2- Launch the PDF file that you want to compress or reduce the size of. Note that the size of this file, prior to compression, is 6,362 KB.
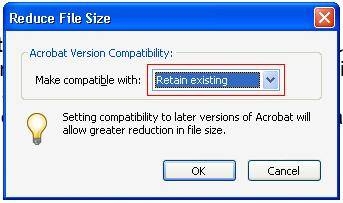
3- Click once on the “Document” drop down menu and select the “Reduce File Size” option.
4- Use the “Make compatible with” drop down menu to select a version of Acrobat reader that the reduced file size will be compatible with. As noted on the “Reduce File Size” window, a greater reduction in file size will be possible when setting the compatibility to a later version of Acrobat.
5- Click once on the “OK” button.
6- Choose a file name for the compressed file by typing into the “File name” field. Most programs, including Acrobat Pro, will automatically populate the field with the name of the source document. For illustrative purposes, the name will be changed to “Demand PDF Sample 02.”
7- Click once on the “Save” button.
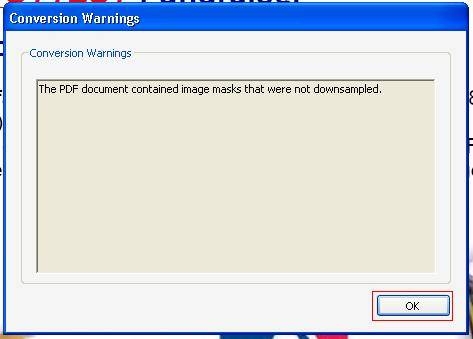
8- Click once on the “OK” button on the pop up window alerting that not all images contained in the PDF file were downsized. This will not always occur. If you do not receive this message, then skip to step 9.
9- Use the “Explore” function to view the reduced file size of the new file, as well as to launch and view it. Note that the file size of the compressed document is 632 KB, which is a 90 percent reduction in size. Please be advised that not all compressions will be this high.

 Arabic
 English


